
Landscaping After Tree Removal
Pro Shortcuts for Homeowners' Landscaping After Tree Removal
Clear the debris and bulk wood chips first, fill and rough-level the stump hole with topsoil, and give it a couple of weeks to settle before deciding what goes there next. That decision usually comes down to three paths: reseed or sod the spot back into lawn, plant something new in a different location, or turn the open ground into a bed, patio, or garden feature. Nothing about that choice needs to happen on day one.
TL;DR:
- Removing bulk sawdust from the stump site prevents nitrogen depletion that can hinder new grass or plant growth.
- Filling the hole in layers and lightly tamping reduces future sinking, but expect additional settling over several weeks.
- Delay planting new trees at least one year near the old root system; shrubs and groundcovers can be planted sooner, with soil amendments if needed.
- Proper soil remediation, including aeration and composting, enhances water and root penetration after equipment compaction.
- Long-term yard health depends on patience, timely soil testing, and following a careful restoration process instead of rushing to replant.
Table of Contents
- How Do You Clean Up and Prep Soil After Tree Removal?
- Should You Reseed, Sod, or Use Groundcover?
- When Can You Plant a New Tree in That Spot?
- Creative Ways to Use the Cleared Space
- When Should You Call a Landscaping Professional?
- Roberto’s Take: Common Mistakes and Realistic Timelines
- Do Old Roots Threaten Nearby Structures or Plants?
- How Do You Prevent Erosion and Drainage Problems After Removal?
- What Long-Term Maintenance Does a Restored Yard Need?
- The Real Lesson: Patience Beats a Quick Fix
- Ready to Restore Your Yard the Right Way?
- Sources
- FAQ
How Do You Clean Up and Prep Soil After Tree Removal?
Grinding a stump leaves behind a cone of sawdust and wood chips sitting on top of loose soil. That material looks like mulch, but it behaves nothing like it once it starts breaking down.
Bulk sawdust is heavy in carbon, and as it decomposes it pulls nitrogen out of the surrounding soil, which is exactly what starves new grass and young plants. Removing the bulk sawdust and hauling it off, or composting it separately, prevents that nitrogen drain before it starts.
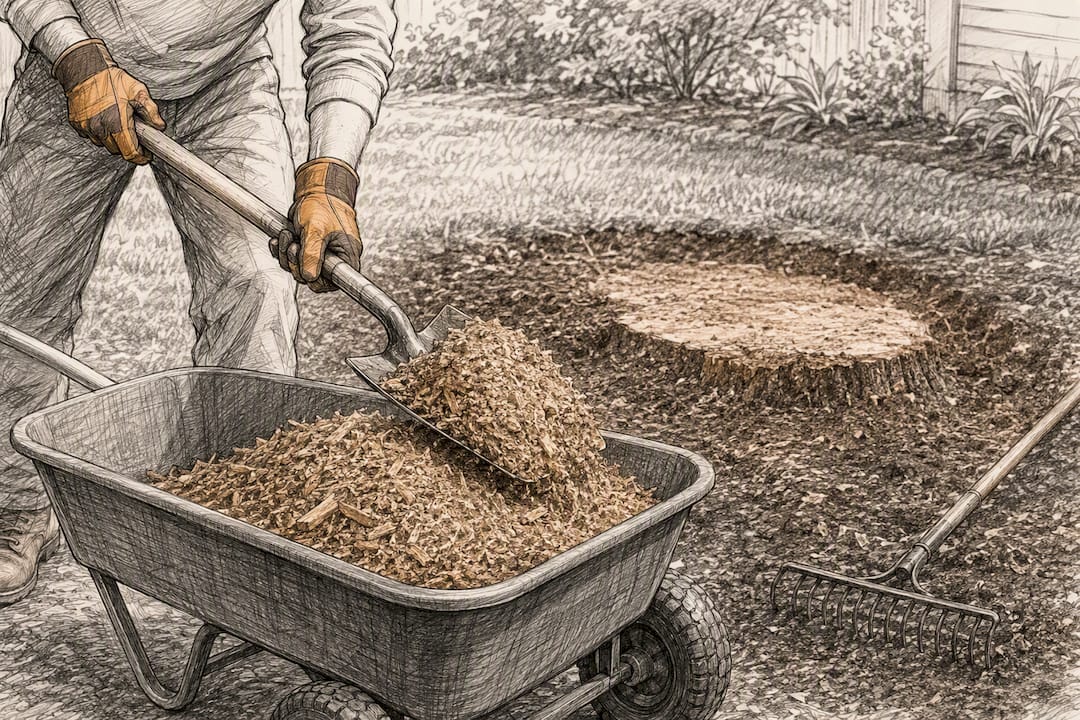
Next comes the hole itself. Fill it with quality topsoil in layers rather than dumping it all at once, tamping lightly between layers to cut down on future sinking. Expect it to settle again anyway over the following weeks.
Equipment traffic during grinding also compacts the surrounding soil, which chokes root growth even after the hole looks fine. Aerating that area, then topdressing with compost, reopens pore space so water and roots can actually move through it.
- Clear large debris and chips before doing anything else
- Fill the stump hole in layers, tamping lightly
- Aerate soil compacted by grinding equipment
- Run a soil test if you plan to plant heavily, and add nitrogen or compost based on results
Pro Tip: If you skip the soil test, add a fast-release nitrogen fertilizer or blood meal anyway before seeding. Leftover sawdust residue will tie up nitrogen for months even after the visible chips are gone.
Should You Reseed, Sod, or Use Groundcover?
Seed costs less and blends more naturally with existing turf, but it takes weeks to establish and needs protection from foot traffic the whole time. Sod costs more, yet it gives you a usable lawn in days and holds soil in place immediately, which matters if the spot sits on a slope.
Groundcover splits the difference for shady or awkward patches where grass never thrived anyway.
- Fill and level the area, checking that it matches the surrounding grade.
- Test or amend the soil, since sawdust residue can leave grass hungry for nitrogen.
- For seed: choose a variety matching your existing lawn, spread it evenly, and keep the surface consistently moist for the first two to three weeks.
- For sod: lay strips tight against each other, roll to remove air pockets, and water daily for the first ten to fourteen days.
- Keep both seed and sod areas off limits to foot traffic and pets until roots have visibly taken hold.
Southern Living’s step-by-step approach to yard recovery backs this same order: clear, fill, smooth, plant, water. Full recovery for seed usually runs six to eight weeks; sod looks finished almost immediately but still needs three to four weeks before it can handle regular use.
When Can You Plant a New Tree in That Spot?
Not yet, in most cases. Extension guidance is specific here: if you want to replant near the old tree’s location, wait at least one year for the old root system to decompose, or plant the new tree several feet away to sidestep root competition entirely.
That delay doesn’t mean the space has to sit empty. Shrubs, perennials, and groundcovers generally establish faster than a tree and tolerate the leftover soil disturbance better, since their root systems are smaller and less sensitive to the decomposing wood underneath.
Sunlight is the other variable people forget. A yard that was shaded for twenty years suddenly gets direct sun for six or eight hours a day, which changes what will actually grow there. Drainage shifts too, since a mature tree’s roots used to pull a surprising amount of water out of the surrounding soil.
- Wait 1 to 2 years, or plant 6 to 8 feet away, if you want another tree
- Shrubs, perennials, and groundcovers can go in much sooner
- Reassess sun exposure before choosing new plants, not before
- Loosen and amend the soil in the planting zone even if you’re not planting immediately
Creative Ways to Use the Cleared Space
An empty circle of dirt doesn’t have to become “the spot where the tree used to be” forever. It can become the most interesting part of the yard.
A mulched planting bed is the easiest upgrade: shrubs and perennials chosen for the new light level, edged cleanly, and finished with a layer of mulch. If the tree’s old canopy created a rain shadow or a puddle problem, a rain garden with moisture tolerant plants can turn a drainage headache into a feature instead of a nuisance.
Where the grade allows it, a small patio, gravel seating area, or rock garden makes use of ground that would otherwise just be lawn you have to mow. Native groundcovers work well for spots that get too much shade for grass or too little for a garden bed to thrive.
- Mulched bed with shrubs matched to current sun exposure
- Rain garden if drainage patterns changed after removal
- Small patio or gravel seating nook where grade is flat
- Native groundcover for shady or awkward corners
- Leftover wood chips, once aged, make usable mulch for beds elsewhere in the yard
Pro Tip: Don’t mulch with wood chips from a diseased tree. Bag them for disposal instead of spreading them near healthy plants, since some pathogens survive in the chips.
When Should You Call a Landscaping Professional?
Some problems are easy to fix with a bag of topsoil and a rake. Others aren’t, and trying to force them usually costs more time than calling someone in the first place.
Watch for ground that keeps sinking well past the normal settling window, root masses too large to dig out by hand, water pooling where it never used to, or mushrooms and soft, spongy soil that suggest rot spreading underground.
- Persistent settling months after filling the hole
- Large surface roots interfering with a walkway, fence line, or foundation
- Standing water or new erosion patterns after rain
- Fungal growth or soft spots signaling decay below grade
A stump grinding professional can regrind low or resurfacing stumps, excavate stubborn root masses, regrade the area properly, and follow up with sod installation or a mulch delivery. A solid contractor will assess the site in person, give you a written quote, and tell you a realistic timeline before any equipment shows up.
Roberto’s Take: Common Mistakes and Realistic Timelines
The mistake I see most is impatience. Homeowners fill the hole once, plant into it two days later, and wonder why everything sits crooked a month on. Ground from a fresh grind keeps settling for weeks, sometimes longer, and skipping that wait is the single most common reason a new planting fails.
The second mistake is ignoring compaction. People fixate on the visible sawdust and never touch the packed soil around it, where equipment tires did the real damage.
Our own crews follow a simple order: grind below grade, clear debris, fill in stages, then hand the yard back with clear notes on when it’s safe to plant. We offer free on-site quotes within a day or two, carry full insurance, and back the work with a 30-day satisfaction guarantee. If you want more detail before you call anyone, our blog covers the whole restoration process step by step.
Do Old Roots Threaten Nearby Structures or Plants?
Sometimes, yes, and it’s worth checking before you assume the risk ended when the stump did. Large surface roots from mature trees often run under sidewalks, patios, and foundation footings, and they don’t stop growing the instant the trunk comes down. Root systems from certain species also decompose slowly enough to keep shifting soil for a year or more.
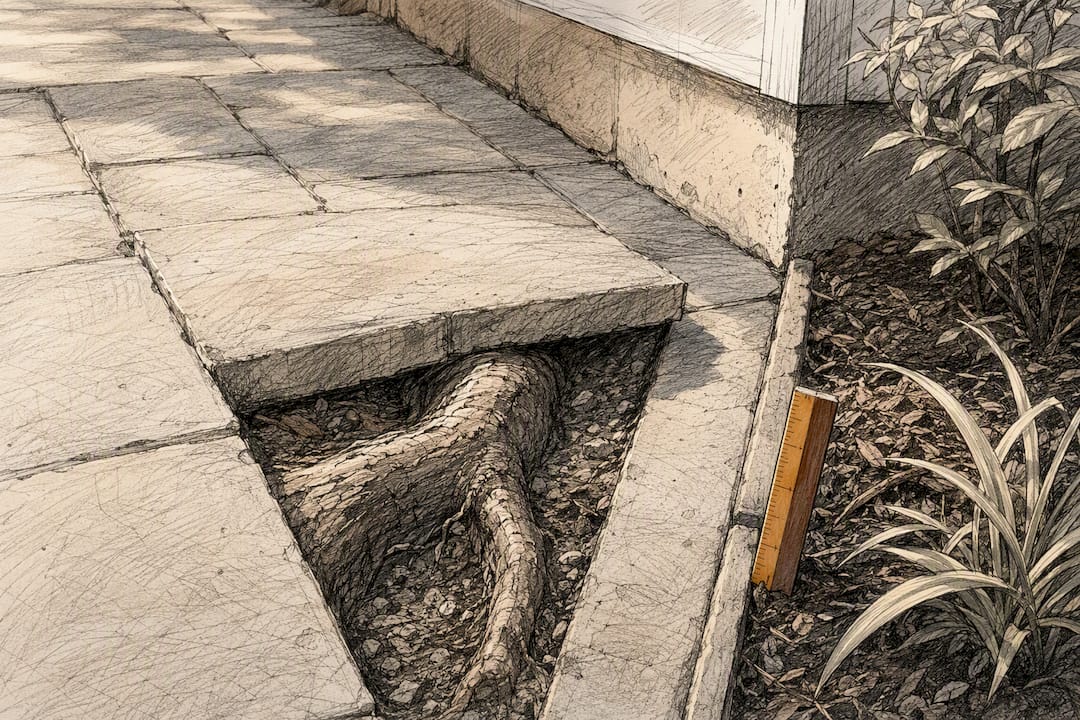
Cracked pavers, a fence post that’s suddenly leaning, or a slab that’s developed a new gap are all signs a root is still doing work underground even without a tree attached to it. If a stump sat within ten feet of a foundation or a retaining wall, it’s worth having someone check for root intrusion before you build anything new on top of that ground.
Nearby plants face a different problem: competition and disease carryover. If the removed tree had root rot or a fungal issue, planting a susceptible species too close can pass the same problem to the new plant, which is part of why extension advisors recommend distance or a waiting period rather than an immediate replant in the same footprint. Established shrubs near the old tree may also show stress for a season as their root zones readjust to less competition for water, which usually resolves once they adapt to the extra resources.
The safest move is a visual check a few weeks after removal, looking for any structural shift, and a conversation with a contractor if you spot one.
How Do You Prevent Erosion and Drainage Problems After Removal?
A mature tree pulls an enormous volume of water out of the soil every day, and its canopy breaks the force of rain before it ever hits the ground. Take that tree away and both jobs disappear at once, which is why yards that never had a drainage issue suddenly develop one after a big removal.
Bare, freshly disturbed soil erodes fast, especially on any kind of slope, so the priority is covering that ground quickly rather than leaving it exposed through a few rainstorms. Grass seed with straw cover, sod, or a dense groundcover planting all do the job, and even a temporary layer of mulch over bare dirt slows runoff while you decide on a permanent plan.
Watch the area after the next few rain events for pooling that wasn’t there before, or for a new channel of bare dirt cutting across the yard. Both are signs the water table or runoff path shifted more than expected. A shallow swale, a French drain, or simply regrading a low spot can redirect water before it becomes a standing problem. If the old tree sat on a slope, consider terracing the bed with low retaining edges or planting deep-rooted groundcover that holds soil the way the tree’s root system used to.
Getting cover established fast matters more here than almost any other step in the whole restoration process, since a few weeks of exposed soil during heavy rain can undo months of careful lawn or bed work.
What Long-Term Maintenance Does a Restored Yard Need?
The first season after restoration is the highest-maintenance period a new lawn or bed will ever have, and it eases off from there if you stay consistent early. New seed or sod needs regular watering through its first summer, typically more frequent than an established lawn nearby, until root systems reach normal depth.
Soil that received compost or nitrogen amendments to counter sawdust depletion usually needs a follow-up feeding the next season, since that first round of amendment gets used up as the new plants and grass establish. A basic soil test every couple of years tells you whether pH and nutrients have leveled out or need another adjustment.
Newly planted shrubs and perennials benefit from a fresh layer of mulch each spring, both to hold moisture and to keep suppressing weeds in what was recently bare, disturbed ground. Beds built on a former stump site also deserve an occasional check for new settling, particularly after a wet winter, since deep root decomposition can continue quietly for a couple of years even after the surface looks stable.
Beyond year two, maintenance on a well-established replacement lawn or bed looks like any other part of the yard: regular mowing or pruning, seasonal fertilizing, and the normal watering schedule for whatever you planted.
The Real Lesson: Patience Beats a Quick Fix
Most of the advice floating around about restoring a yard after tree removal focuses on speed, get grass back fast, plant something pretty right away. The research and the contractor experience behind this guide point the other direction. The single biggest factor in whether a restoration project holds up is whether the homeowner respected the timeline instead of rushing it.
Waiting a season before planting a new tree, letting settled ground actually settle, and testing soil before assuming it’s ready are unglamorous steps, but they are the ones that determine whether the yard looks good in year one or year three. Conventional advice tends to skip straight to “what to plant” without addressing why the soil underneath might reject it.
Prioritize the boring groundwork first: clear debris, fix nitrogen depletion, deal with compaction. The creative part, the bed, the patio, the new tree, works far better once that foundation is actually solid rather than freshly disturbed dirt wearing a layer of topsoil.
— Roberto
Ready to Restore Your Yard the Right Way?
Roberto’s Stump Grinding Services handles the part of this process that’s hardest to do with a rented tool and a weekend, grinding the stump cleanly below grade so the ground is actually ready for what comes next. We cover stump grinding, debris removal, mulch delivery and installation, and sod installation across 18 cities in North Atlanta, so you can go from stump to finished lawn without hiring four different companies.
Every job starts with a free on-site quote, typically scheduled within one to two days of your call. We’re fully insured, we back the work with a 30-day satisfaction guarantee, and if sod is the fastest path back to a usable lawn, our sod installation guide walks through what to expect before the crew even arrives. If a storm took the tree down and left a bigger mess than a clean removal would have, our storm cleanup guide covers that specific situation too. Request your free quote today and get a real timeline instead of a guess.
Sources
- Can I replant new tree in same spot after old tree removed? | Yard and Garden
- 4 Easy Steps To Bring Your Yard Back To Life After Removing A Tree
- Sawdust properties and soil effects | Nature’s Way Resources
FAQ
What Are Good Ways to Landscape a Yard After Tree Removal?
Popular options include a mulched planting bed sized to the new sun exposure, a small patio or seating nook, a rain garden if drainage shifted, or simply reseeding or sodding the area back into lawn. The right choice depends on how much sun the spot gets now and whether the ground still needs a season to settle.
What Are Common Mistakes People Make After Stump Removal?
The biggest ones are leaving bulk sawdust in place, which ties up soil nitrogen, and planting too soon before settling and compaction issues are addressed. Skipping a soil test before amending is a close third, since it means guessing at what the soil actually needs.
What Should You Do With a Lawn After Tree Removal?
Clear debris, fill and level the stump hole with topsoil, then reseed or sod the area, watering consistently while the grass establishes. Seed generally takes six to eight weeks to fully establish, while sod is usable in three to four weeks. Roberto’s Stump Grinding Services installs sod directly after grinding for homeowners who want a faster turnaround.
How Long Does Ground Take to Settle After Tree Removal?
Settling typically continues for weeks to months as roots decompose and the fill soil compacts naturally. Check the area periodically and top it off with additional soil rather than planting into ground that’s still sinking.
How Much Does Professional Stump Grinding and Restoration Cost?
Pricing depends on stump size, root spread, and whether follow-up services like sod or mulch are included, so current rates are listed directly on the Roberto’s Stump Grinding Services site. Every job starts with a free on-site quote, usually scheduled within one to two days.
Recommended
Get a free in-person quote.
We come out, walk the property with you, and give you the number on the spot, free, no obligation, across 18 north Atlanta cities.
Call (770) 309-1050